
ClipForge AI / User GuideSheet 10 of 14 / Brand kit
Brand kit
Your logo, colours, fonts and caption look, set once and used on every export that carries your brand.
Brand kitStation 10 of 146 tasks9 steps0 tasks not built yet
Tasks
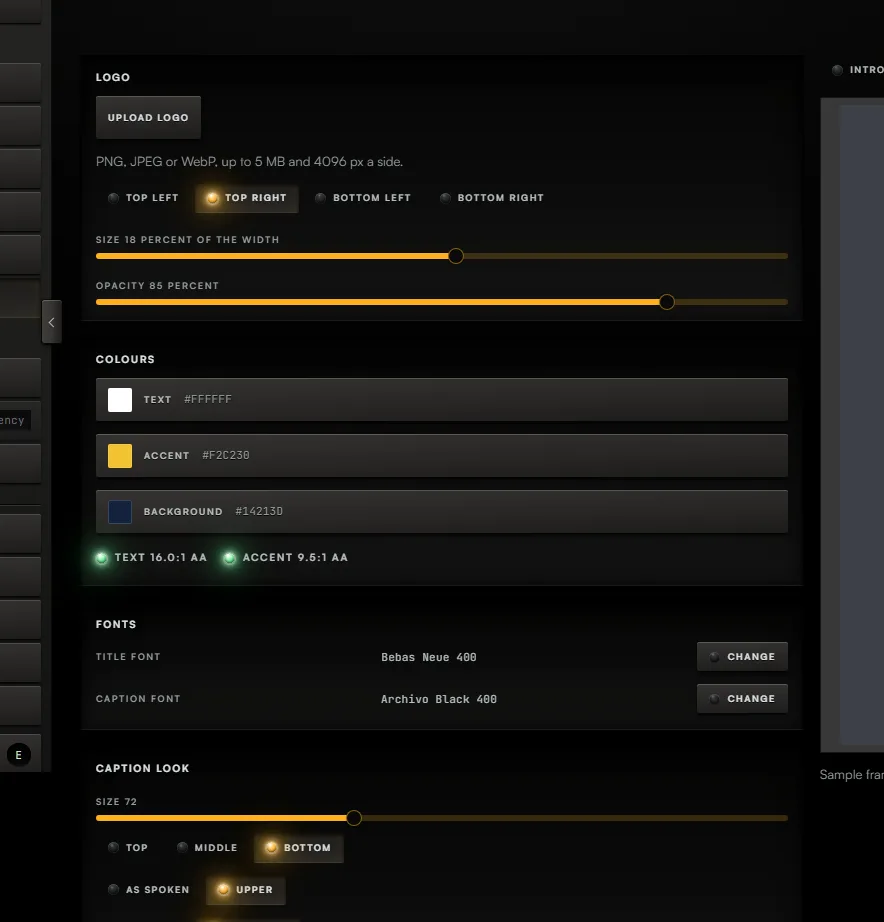
Task 01 / Brand kit Pro
Add your logo
Procedure / 1 step
- Callout 1. Press Upload logo and choose an image. Then pick its corner, size and opacity.
Task 02 / Brand kit
Set colours and fonts
Procedure / 2 steps
- Callout 2. Press a colour to open its picker. Text, Accent and Background are set one at a time.
- Callout 3. Press Change beside the title font or the caption font, and choose a family and weight.
Task 03 / Brand kit Creator
Set how captions look
Procedure / 2 steps
- Callout 4. Set the caption size, then its position, case, lines, animation and treatment.
- There is no Save button. Each change saves by itself, and the lamp at the top reads Saved.
Task 04 / Brand kit Pro
Add an intro and an outro card
Procedure / 2 steps
- Switch on Intro card or Outro card, and type its headline.
- The lower third sets how a name and role look. You place lower thirds on the timeline in Pro Studio.
Task 05 / Brand kit Agency
Keep a kit for each client
Procedure / 1 step
- Type a client's name in Client name and press Add client kit. The Kit row then switches between your brand and each client's.
Task 06 / Brand kit Agency
Dub a clip into other languages
Procedure / 1 step
- Press Voice studio. Dubbing puts an exported clip's speech into other languages.
01 of 06
Fig. 10 / Brand kit console