
ClipForge AI / User GuideSheet 14 of 14 / Settings and Billing
Settings and Billing
Your name, your emails, your AI keys, your plan and your account.
Settings and BillingStation 14 of 147 tasks12 steps0 tasks not built yet
Tasks
Task 01 / Settings and Billing
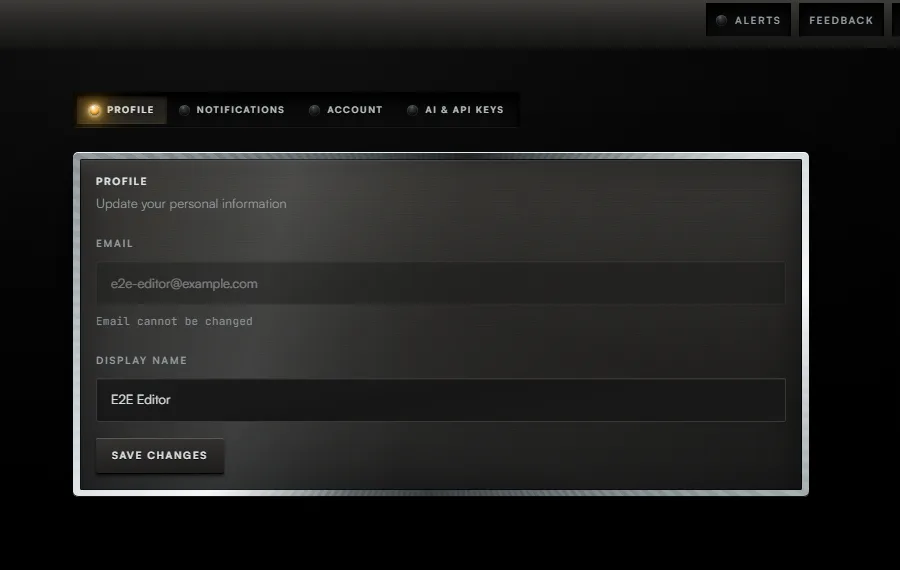
Change your display name
Procedure / 2 steps
- Callout 1. Type it in Display Name and press Save Changes. The email address cannot be changed here.
- Callout 2. Press Save Changes.
Task 02 / Settings and Billing
Choose the email you get
Procedure / 1 step
- Press Notifications, set Email me when a project is ready, and press Save notification preferences.
Task 03 / Settings and Billing
Use your own AI key
Procedure / 1 step
- Callout 3. Press AI and API Keys, paste a key beside its provider and press Save key. Test connection checks it.
Task 04 / Settings and Billing
Connect Google Drive
Procedure / 3 steps
- In Settings press Accounts, then Connect Google Drive under Google Drive. The Google Drive key at the top of every screen opens the same place.
- Choose the Google account whose Drive you want. It need not be the one you sign in with, nor the one that owns your YouTube channel. Settings shows the account it connected.
- Disconnect, under Google Drive, stops imports and saves. Videos already copied in, and clips already in Drive, stay where they are.
Task 05 / Settings and Billing
Change your plan
Procedure / 2 steps
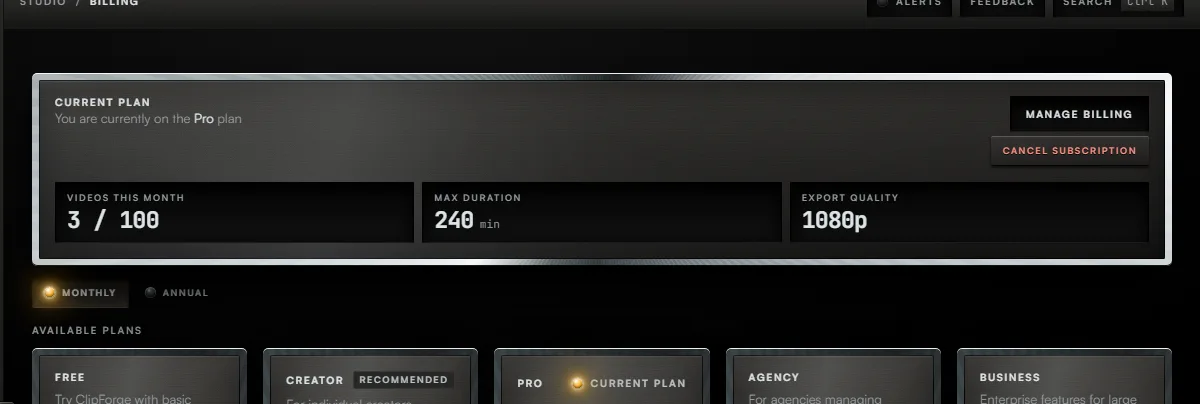
- Callout 1. On Billing, choose Monthly or Annual, then press the button on the plan you want.
- Callout 2. Press Manage Billing to change your card or see invoices. It opens the payment provider's own page.
Task 06 / Settings and Billing
Cancel or pause your subscription
Procedure / 2 steps
- Callout 3. On Billing press Cancel subscription. You are offered a pause first; Continue to cancel goes on to cancelling.
- This is also how you move to the free plan: the button on the Free card is switched off.
Task 07 / Settings and Billing
Delete your account
Procedure / 1 step
- In Settings press Account, then Delete. Type DELETE to confirm and press Confirm Delete.
01 of 07
Fig. 14 / Settings and Billing console