
ClipForge AI / User GuideSheet 04 of 14 / Project
Project
One video and everything made from it: its transcript, its clips and their exports.
ProjectStation 04 of 145 tasks8 steps1 task not built yet
Tasks
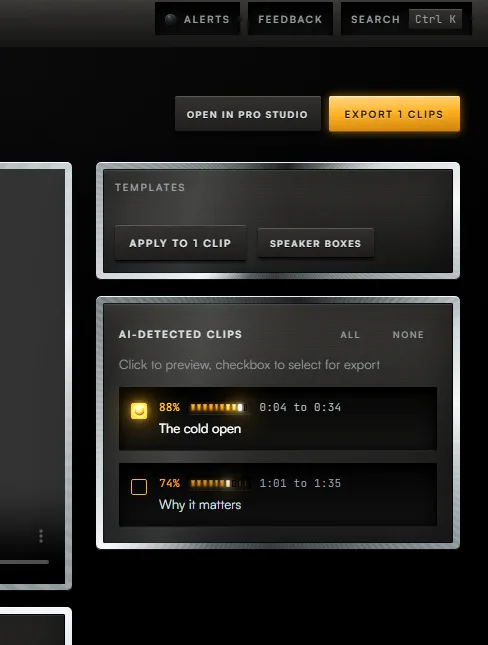
Task 01 / Project
Review the clips
Procedure / 2 steps
- Callout 1. Wait for AI-Detected Clips to fill. Each row is one clip with its score.
- Callout 2. Press a clip to open it. The player moves to where the clip starts.
Task 02 / Project
Export a clip
Procedure / 3 steps
- Callout 3. Tick the checkbox beside each clip you want.
- Callout 4. Press Export, then Export again in the dialog. The clip is rendered on the server.
- When the clip reads Download MP4, press it to save the file.
Task 03 / Project
Save a clip to Google Drive
Procedure / 2 steps
- When an exported clip reads Download MP4, press Save to Drive beside it. The clip goes to a folder named ClipForge AI in your Drive, and the button becomes Saved to Drive, a link to the file.
- If it reads Connect Drive to save, connect Drive in Settings under Accounts, then come back to the clip.
Task 04 / Project
Edit on the timeline
Procedure / 1 step
- Press Open in Pro Studio to place the whole video on a timeline.
Task 05 / Project
Post to a social account
Status
Not built yetClipForge does not post to social accounts. Download the MP4 and post it from the platform.
01 of 05
Fig. 4 / Project console